

Recipe: Burnt Sugar Fruitcake with Whiskey Glaze
Indian fruitcake is a traditional rum-soaked specialty that's part of Anglo-Indian cuisine—a convergence of colonial British and South Asian cuisines. Indian fruitcake (or plum cake as it's sometimes called) has been embraced by South Asians and unlike its Western predecessor, it’s eaten year-round.
Originally published in the Food52
Indian fruitcake is a traditional rum-soaked specialty that's part of Anglo-Indian cuisine—a convergence of colonial British and South Asian cuisines. Indian fruitcake (or plum cake as it's sometimes called) has been embraced by South Asians and unlike its Western predecessor, it’s eaten year-round.
This recipe pairs decadent ingredients that only get better with time: dark liquor, fatty nuts, and dried fruit with layers of sun-ripened sweetness encased in their jewel toned skins. It’s rich without being dense thanks to fluffy egg whites and extra gentle mixing.
In India, it’s customary for fruitcake preparation to be a communal event, and extra rum turns it into a real party. Grab a few friends, sip little rum-filled glasses, and get to baking!
by Surbhi Sahni
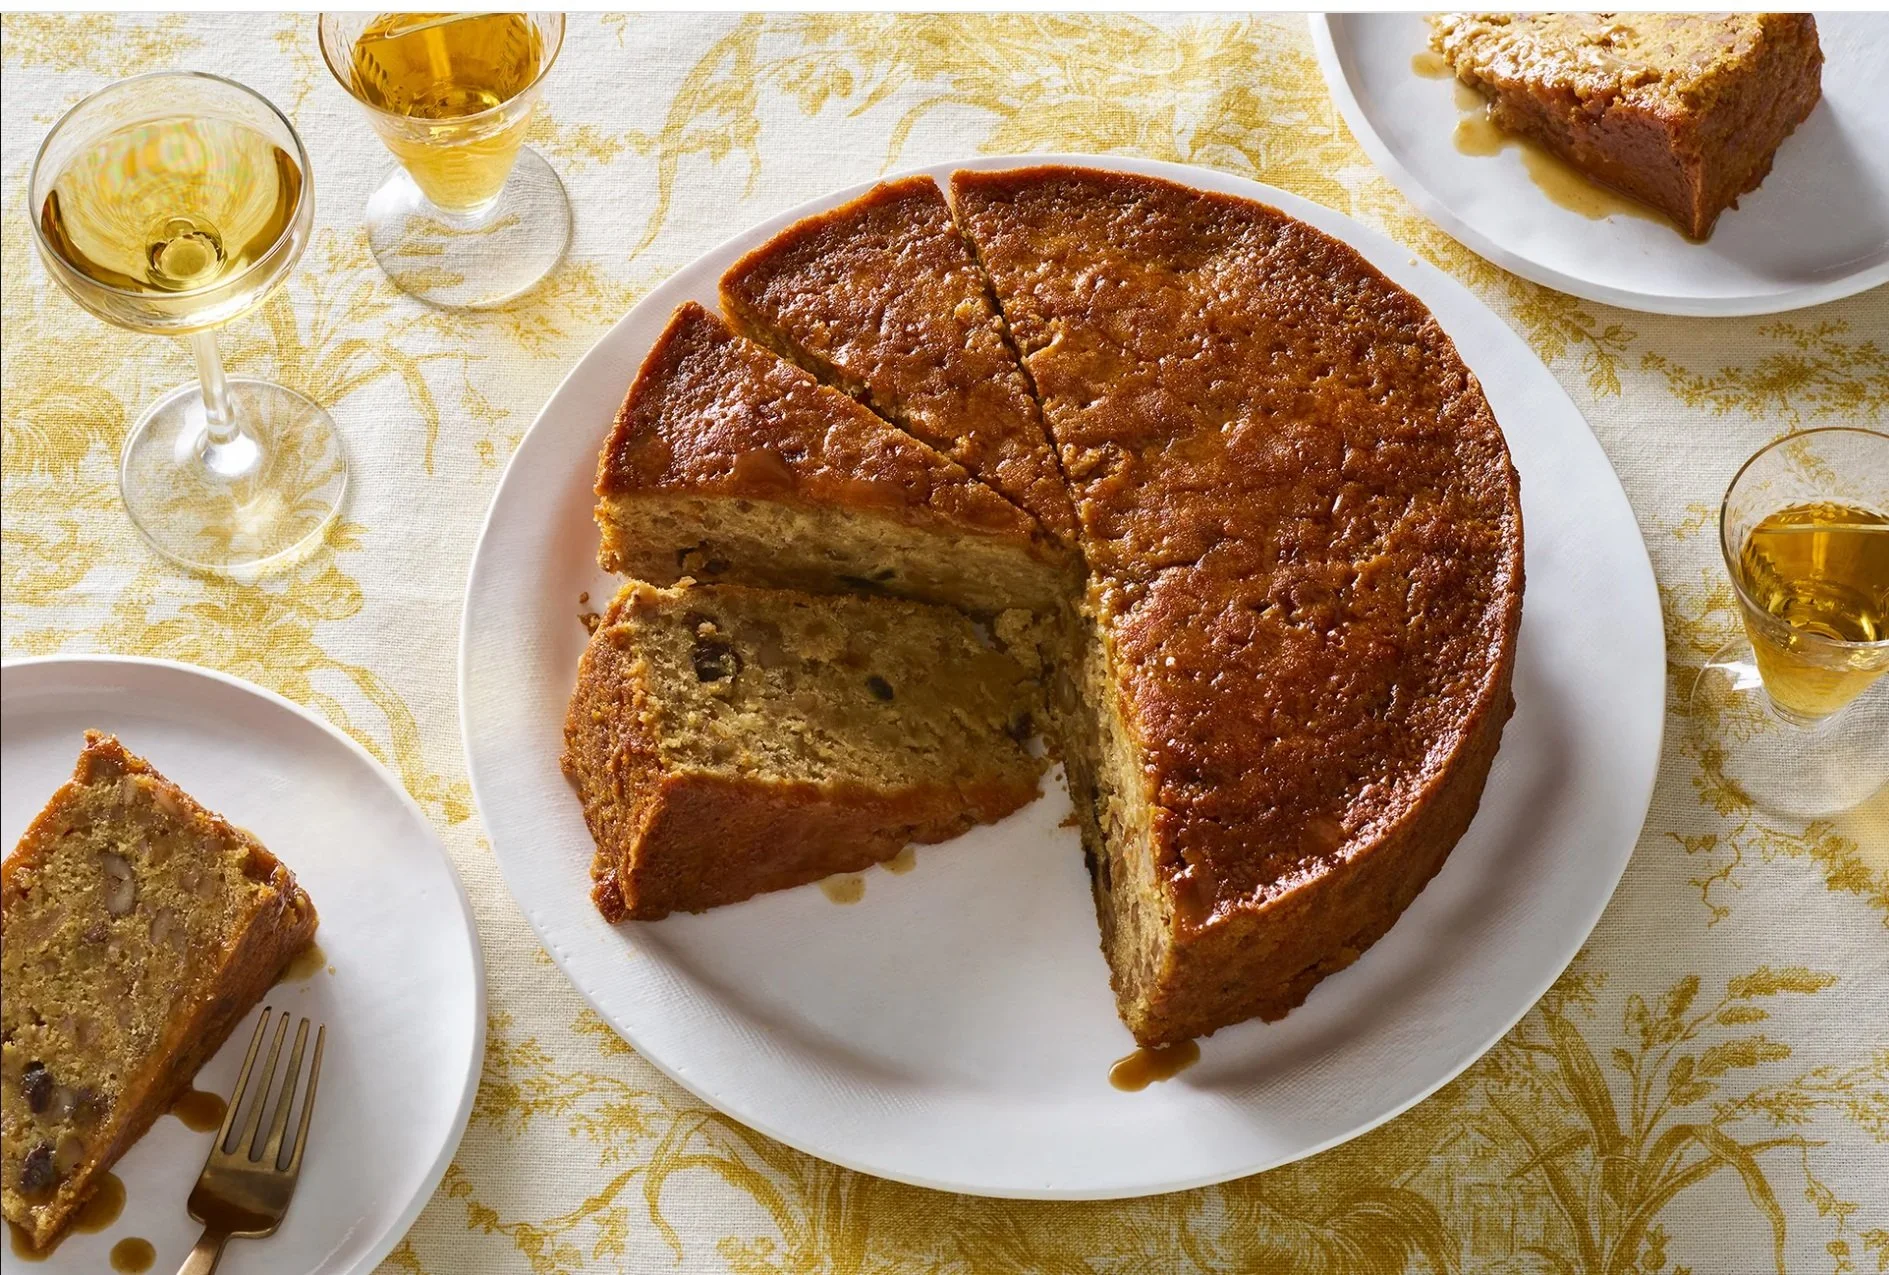
PHOTO BY JAMES RANSOM
Makes one 9-inch round cake
Ingredients
For the rum-soaked nuts:
1 cup raw cashews, roughly chopped
1 cup roasted almonds, roughly chopped
1/2 cup toasted pecans, roughly chopped
1/4 cup dark raisins
1 1/2 cups whiskey
1 1/2 cups dark rum
For the burnt sugar:
1 cup plus 3 tablespoons (250 grams) granulated sugar
For the cake:
Neutral oil or nonstick cooking spray, for greasing pan
141 grams (1 1/4 sticks) unsalted butter, room temperature
1 cup plus 2 tablespoons (225 grams) granulated sugar
1/2 cup (106 grams) packed light brown sugar
1 cup burnt sugar
3 cups plus 2 tablespoons (375 grams) all-purpose flour, divided
1 teaspoon kosher salt
1/2 teaspoon baking powder
1/2 teaspoon ground ginger
1/4 teaspoon garam masala, homemade or store bought
2 large eggs, kept whole
2 large eggs, yolks separated from whites
3 cups rum-soaked nuts
2 table spoons reserved alcohol from soaked nuts
1 cup freshly squeezed orange juice
For the rum syrup:
2/3 cup reserved alcohol from the soaked nuts
3 tablespoons freshly squeezed orange juice
1 1/2 teaspoons granulated sugar
Instructions
Make the rum soaked nuts: Combine nuts, raisins, whiskey, and rum in a container with an airtight lid. Nuts and fruit should be fully submerged in the alcohol. Cover and refrigerate for at least 2 weeks before using.
Make the burnt sugar: Add sugar to a medium saucepan over medium heat. Shake the pan to evenly distribute the sugar granules. Stir frequently, and cook until sugar bubbles, caramelizes, and turns very dark in color, 6 to 8 minutes (sugar may clump a bit but it will all melt toward the end).
Remove from heat and carefully whisk in water (it will bubble and steam a lot, so use caution!). Return to medium heat and simmer sugar until all the granules melt, about 2 to 3 minutes. Remove from heat and transfer to a bowl; set aside to cool at room temperature for 1 to 2 hours, or refrigerate for up to 2 days.
Make the cake: Heat the oven to 350°F. Grease the bottom of a 9-inch-round cake pan with neutral oil or non-stick cooking spray. Then, line the bottom of the pan with parchment paper.
Strain rum soaked nuts through a fine-mesh sieve (reserving alcohol), and place nuts in a mixing bowl. Add 2 tablespoons of reserved alcohol and set aside.
Sift all but ⅓ cup flour, salt, baking powder, ginger, and garam masala twice into a large mixing bowl. Sift remaining flour into a separate bowl.
Using a stand mixer fitted with a paddle attachment, beat butter on medium speed until creamy, about 2 minutes. Add both sugars. Beat on medium speed until light and fluffy, 3 to 4 minutes. Stop the mixer to scrape down the sides as needed.
Add 2 whole eggs and 2 egg yolks to butter-sugar mixture and mix on medium speed until well combined, 1 to 2 minutes. Add burnt sugar and mix to combine, about 1 minute.
Slowly add dry ingredients, orange juice, and reserved 2 tablespoons of alcohol alternately to batter, beginning and ending with dry mixture, until batter is smooth and well incorporated. Do not overmix.
Stir remaining flour into the strained nuts and toss until flour has evenly coated the nuts. Gently fold coated nuts into the batter until just combined. Using a stand mixer fitted with a whisk attachment, whisk the 2 egg whites vigorously until firm peaks hold. Remove from the stand mixer. Using a rubber spatula, gently fold into the cake batter, stirring just until no white streaks remain.
Pour batter into the prepared pan. Bake 45 minutes, then loosely tent the cake with aluminum foil. Reduce the oven to 325°F. Bake until deep golden brown and a cake tester inserted into the center comes out clean, about 50 to 70 minutes more.
Make the rum syrup: Place ⅔ cup of reserved alcohol, orange juice, and sugar in a small saucepan over medium heat. Bring to a simmer and cook, stirring, until sugar dissolves and mixture comes to a boil, 3 to 5 minutes. Remove from heat and set aside to cool.
As soon as the cake is removed from the oven, brush the top with a little more than half the syrup. Let cool for 15 minutes, then use a butter knife to loosen the cake from the sides of the pan. Remove from the baking dish and transfer to a piece of parchment paper. Brush the sides of the cake with half the remaining syrup, then let the cake cool completely.
Serve at room temperature and drizzle slices with any additional syrup. To store, wrap the cake tightly in plastic wrap and store it in the refrigerator for up to 3 months.
Cooks Notes
My personal favorite garam masala is from Diaspora Co.
Rum soaked nuts can be stored up to 3 months in the refrigerator
Storage notes: the cake can be refrigerated in tightly wrapped plastic wrap for up to 3 months

Our Guide to Pride 2023 🏳️🌈 🏳️⚧️
This Pride month, there are so many ways to celebrate our LGBTQ+ community and for allies to show meaningful solidarity. We've put together a guide to our favorite pop-ups, organizations & local queer-owned businesses you can support all year long!

At the NYC Pride march, a queer person wearing a trans flag holding up a sign that reads, “Respect your roots. Trans women of color rioted for your right to Pride!”
This Pride month, there are so many ways to celebrate our LGBTQ+ community and for allies to show meaningful solidarity.
We've put together a guide to our favorite organizations, pop-ups & local queer-owned businesses you can support all year long!
STAND UP FOR QUEER & TRANS JUSTICE
Help organizations that protect queer and trans people stay running by donating extra funds, volunteering your time, and advocating to your local lawmakers on issues that matter.
This year, we have seen a staggering number of violent anti-trans and anti-queer legislative bills in states across the U.S. that ban trans existence in public, gender affirming healthcare, LGBTQ history, and creative queer expression. Be part of the change and help ensure that queer and trans kids grow up to be adults and can live in safety.
⚖️ Sylvia Rivera Law Project
SRLP is a collective organization that provides free legal services to meet survival needs and build community power with transgender people who are low-income, people of color, and immigrants.
🩺 Callen-Lorde Community Health Center
Callen-Lorde provides healthcare services, education and wellness to New York’s lesbian, gay, bisexual, and transgender communities regardless of ability to pay.
🍽️ Queer Food Foundation
QFF is a collective-run resource and platform for queer folks in food and beverage. Their mutual aid fund provides support for Black Queer and Trans folks facing food insecurity.
🥕 Love Wins Food Pantry
Love Wins provides LGBTQ and gender non-conforming people & families access to healthy vegetables and non-perishable food.

SHOW SUPPORT ALL YEAR
Pride month is in June, but true allyship happens during the other eleven months of the year. Attend a local Pride march, patronize your neighborhood queer vendors, and shop from queer-owned small businesses (like ours!) year round.
Here are just a few of our favorites in NYC, but look up queer events and LGBTQ+ creators closest to you to show your patronage and to get involved!
🎪 Hester Street Fair Pride Market
We will be at this pop-up market of all queer-vendors serving TAGMO fare featuring Diaspora Co. spices. Join us Saturday, June 24th from 11:00 AM to 6:00 PM at The Seaport, 89 South Street in Manhattan.
🥣 Queer Soup Night
QSN is a queer-run pop-up with chapters across the U.S. where LGBTQ+ folks and allies can share food and raise funds to strengthen grassroots social justice movements.
🗺️ Diaspora Co.
Diaspora Co. is a queer South Asian-run spice company that sources South Asia's freshest, heirloom, and single-origin spices directly from farmers.
🌶️ Shaquanda Will Feed You
Shaquanda's is a queer Black-owned small business making drag-themed small-batch hot sauces. Each flavor uses high quality chili pepper varietals and relies on the bounty of mother nature, with less sugar and salt than commercial sauces.
🌯 Ursula Brooklyn
Ursula is a queer-run New Mexican inspired cafe & bakery in Brooklyn that centers activism in the hospitality industry and the queer food community.

A Valentine's Collaboration: Regional South Indian Cuisine with Seema Pai
In honor of Valentine’s Day, we are collaborating with our friend chef Seema Pai on a prix fixe dinner featuring homestyle South Indian cuisine. Seema and chef Surbhi have curated an exciting menu with dishes rarely found on restaurant menus. This regional food (with its many sub-regions and culinary techniques) offers a taste and understanding of coastal cuisine from across India’s southern shores.
In honor of Valentine’s Day, we are collaborating with our friend and chef, Seema Pai on a prix fixe dinner featuring homestyle South Indian cuisine.
Seema and chef Surbhi have curated an exciting menu with dishes rarely found on restaurant menus. This regional food (with its many sub-regions and culinary techniques) offers a taste and understanding of coastal cuisine from across India’s southern shores.
We spoke with Seema about her upbringing, culinary background and what makes this menu collaboration a rarity, even in New York City’s vibrant dining culture.
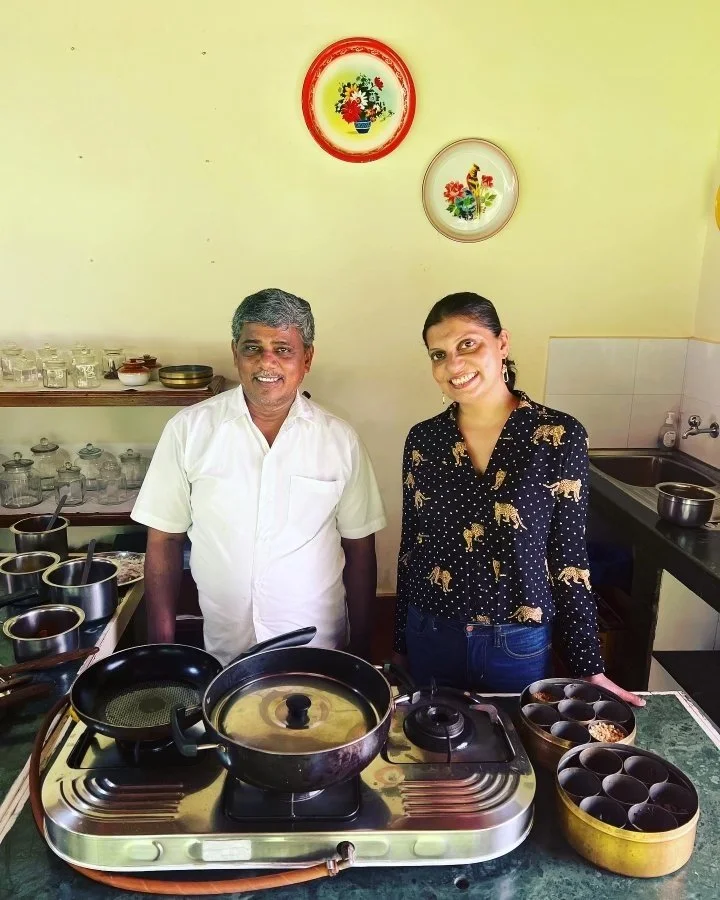
Seema (right) at a homestay in Chettinad, Tamil Nadu where she learned recipes from a local chef (left).
TAGMO: Where did you grow up and what foods shaped your palate?
Seema: I grew up in Mumbai (I still call it Bombay) and I was raised vegetarian, so I grew up eating lots of fresh vegetables, lentils, all that kind of stuff.
My family is originally from South India. They are from the border of Tamil Nadu and Kerala. South Indian flavors with tamarind and coconut, are still my favorite foods in the world. But after I moved to the U.S., I gave up my vegetarianism and started eating everything, because I wanted to get into food and cook for people. I felt like I will have to taste everything before I can do that.
What’s your professional background and how did you enter the culinary industry?
I'm an ex academic. I have a PhD but no culinary training whatsoever. I’m completely self taught. When I was teaching at Boston University, I started seriously thinking about how to get myself into food. A close friend of mine called me up. She said she wanted to quit her job at Microsoft to start a food truck, and asked if I wanted to do it with her. So, I moved up to Seattle and we ran a food truck for two years. We both got third degree burns. I have a skin graft to show for it. Haha.
We worked out of this 15-year-old UPS truck that we rigged into a food truck. We were these two tiny women in a big truck driving through Seattle selling kati rolls, or frankie’s as they're called in Bombay. it was essentially a kati roll truck and we would do specials. After two years, we kind of both plateaued and dropped the thing. She got married and I wanted to do more food stuff, so I moved to New York City and started working in restaurants.
My first job was at a wine bar in Union Square. I wanted to see if I can actually work in New York restaurants, you know? To see if this is what I want to do with my life. After all, I quit academia for it. I quit a very cushy situation to do food, which is so hard as you very well know. I knew if I could survive New York restaurant life, I felt like I could survive anything. I did that for about 3 1/2 years which is when I met Surbhi.
Saar had just opened and I went there to dinner with my partner. I wanted to taste the food, of course, but I had heard so much about Hemant and Surbhi. After dinner, I just straight-up asked them if they were hiring. And they said, “Sure, come in tomorrow.” And I did. That's how I got to know Surbhi and her cooking.
Now I work at a nonprofit, so I'm excited to reconnect with Surbhi and to be in the kitchen with her. It's been a while.
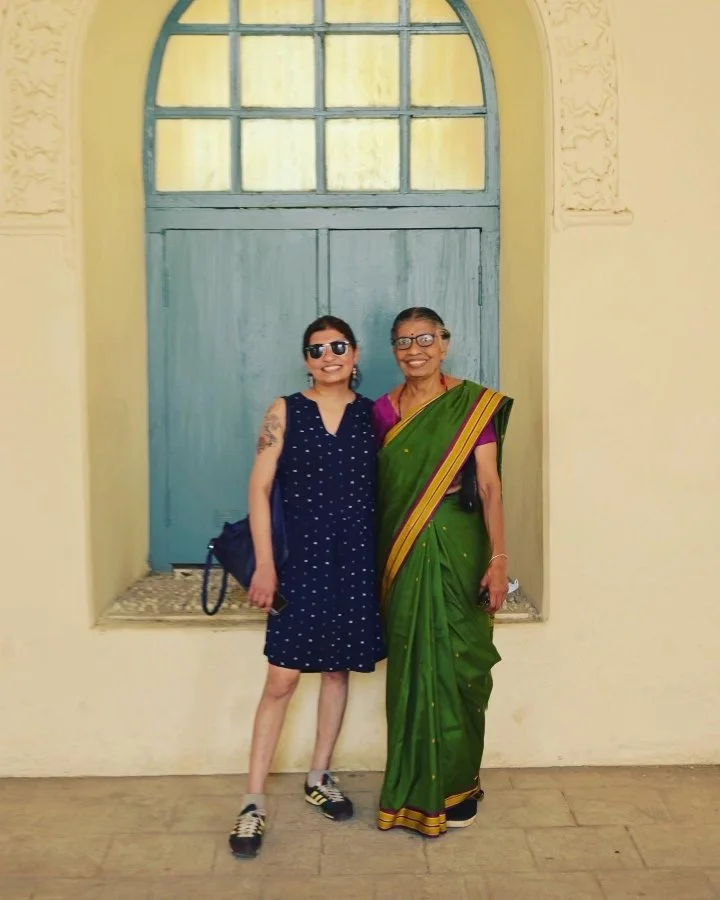
Seema (left) with her mother (right), who she goes to for most of her recipes.
What was it like curating this collaborative menu with Surbhi? What inspired the dishes chosen, and do they have any significant meaning for you?
Surbhi reached out to me saying she wants to do South Indian food for Valentine's Day. Firstly, who has ever done that in New York City or anywhere else? I was extremely excited because I think people are only aware of such a small portion of Indian food. There's so much diversity in our food that people just don't even know about. The menu features food from Kerala and Tamil Nadu in South India, which is a quite large region.
Our thought process was to showcase dishes that you can't get anywhere else. These are flavors that I've grown up with and miss eating. If I want to eat these dishes, I have to make them myself.
The second part was to give people an experience. It's a special day, so we want to give people an memorable experience where they discover flavors that they are not super familiar with. It’s not paneer and butter chicken. It’s really unique.
We also wanted to make sure that we have a vegetarian version of the menu and that it feels equally fun. It’s important to have harmony between the two versions of the menu so that one person doesn't look at the other person's plate and say, “God, I wish I could eat that.” We don’t want couples fighting on Valentine's Day, haha.
The dishes we chose are typically only eaten in people's homes — even in India. Surbhi has been on this journey where she is trying to showcase that kind of food that’s not available in restaurants within India. The whole time when she was doing home meal delivery during the lockdown, I think it gave people so much pleasure by bringing that kind of food to their home. And I think that's partly why she's so beloved by people. So, I wanted to compliment that when she asked me for suggestions.
Can you talk about any particular dishes on the menu?
My favorites is probably the Paruppu Urundai Kuzhambu, which are lentil dumplings in a tangy flavorful sauce. It’s an unusual dish. A lot of people think if there’s a vegetarian dish it has to have paneer. But paneer is not what we eat in South India. Koftas are also we don’t eat in South India. So, I wanted to come up with something that is equally hearty, fun to look at, and fun to eat. I'm looking forward to seeing people's reaction to it.
The recipes we’re using are specifically the recipes I grew up with that come from my family. My paternal grandmother was a fabulous cook. So, it's her recipes that I keep trying to recreate and hopefully have some success with.
Okay, now we’re hungry! Thank you and we can’t wait for this special menu.

Recipe: Dark Chocolate Coconut-Orange Burfi
The perfect winter treat with bitter chocolate, bright citrus and sweet coconut. It’s Surbhi’s take on a classic Indian mithai, with a desi diasporic spin. There is no oven needed to make this mithai, but you’ll need khoya (solidified whole milk), which can be found at your local Indian grocery stores or can be made from scratch by cooking down ricotta cheese.
Originally published in the Food52
The perfect winter treat with bitter chocolate, bright citrus and sweet coconut. It’s Surbhi’s take on a classic Indian mithai, with a desi diasporic spin. There is no oven needed to make this mithai, but you’ll need khoya (solidified whole milk) which can be found at your local Indian grocery stores or can be made from scratch by cooking down ricotta cheese.
by Surbhi Sahni
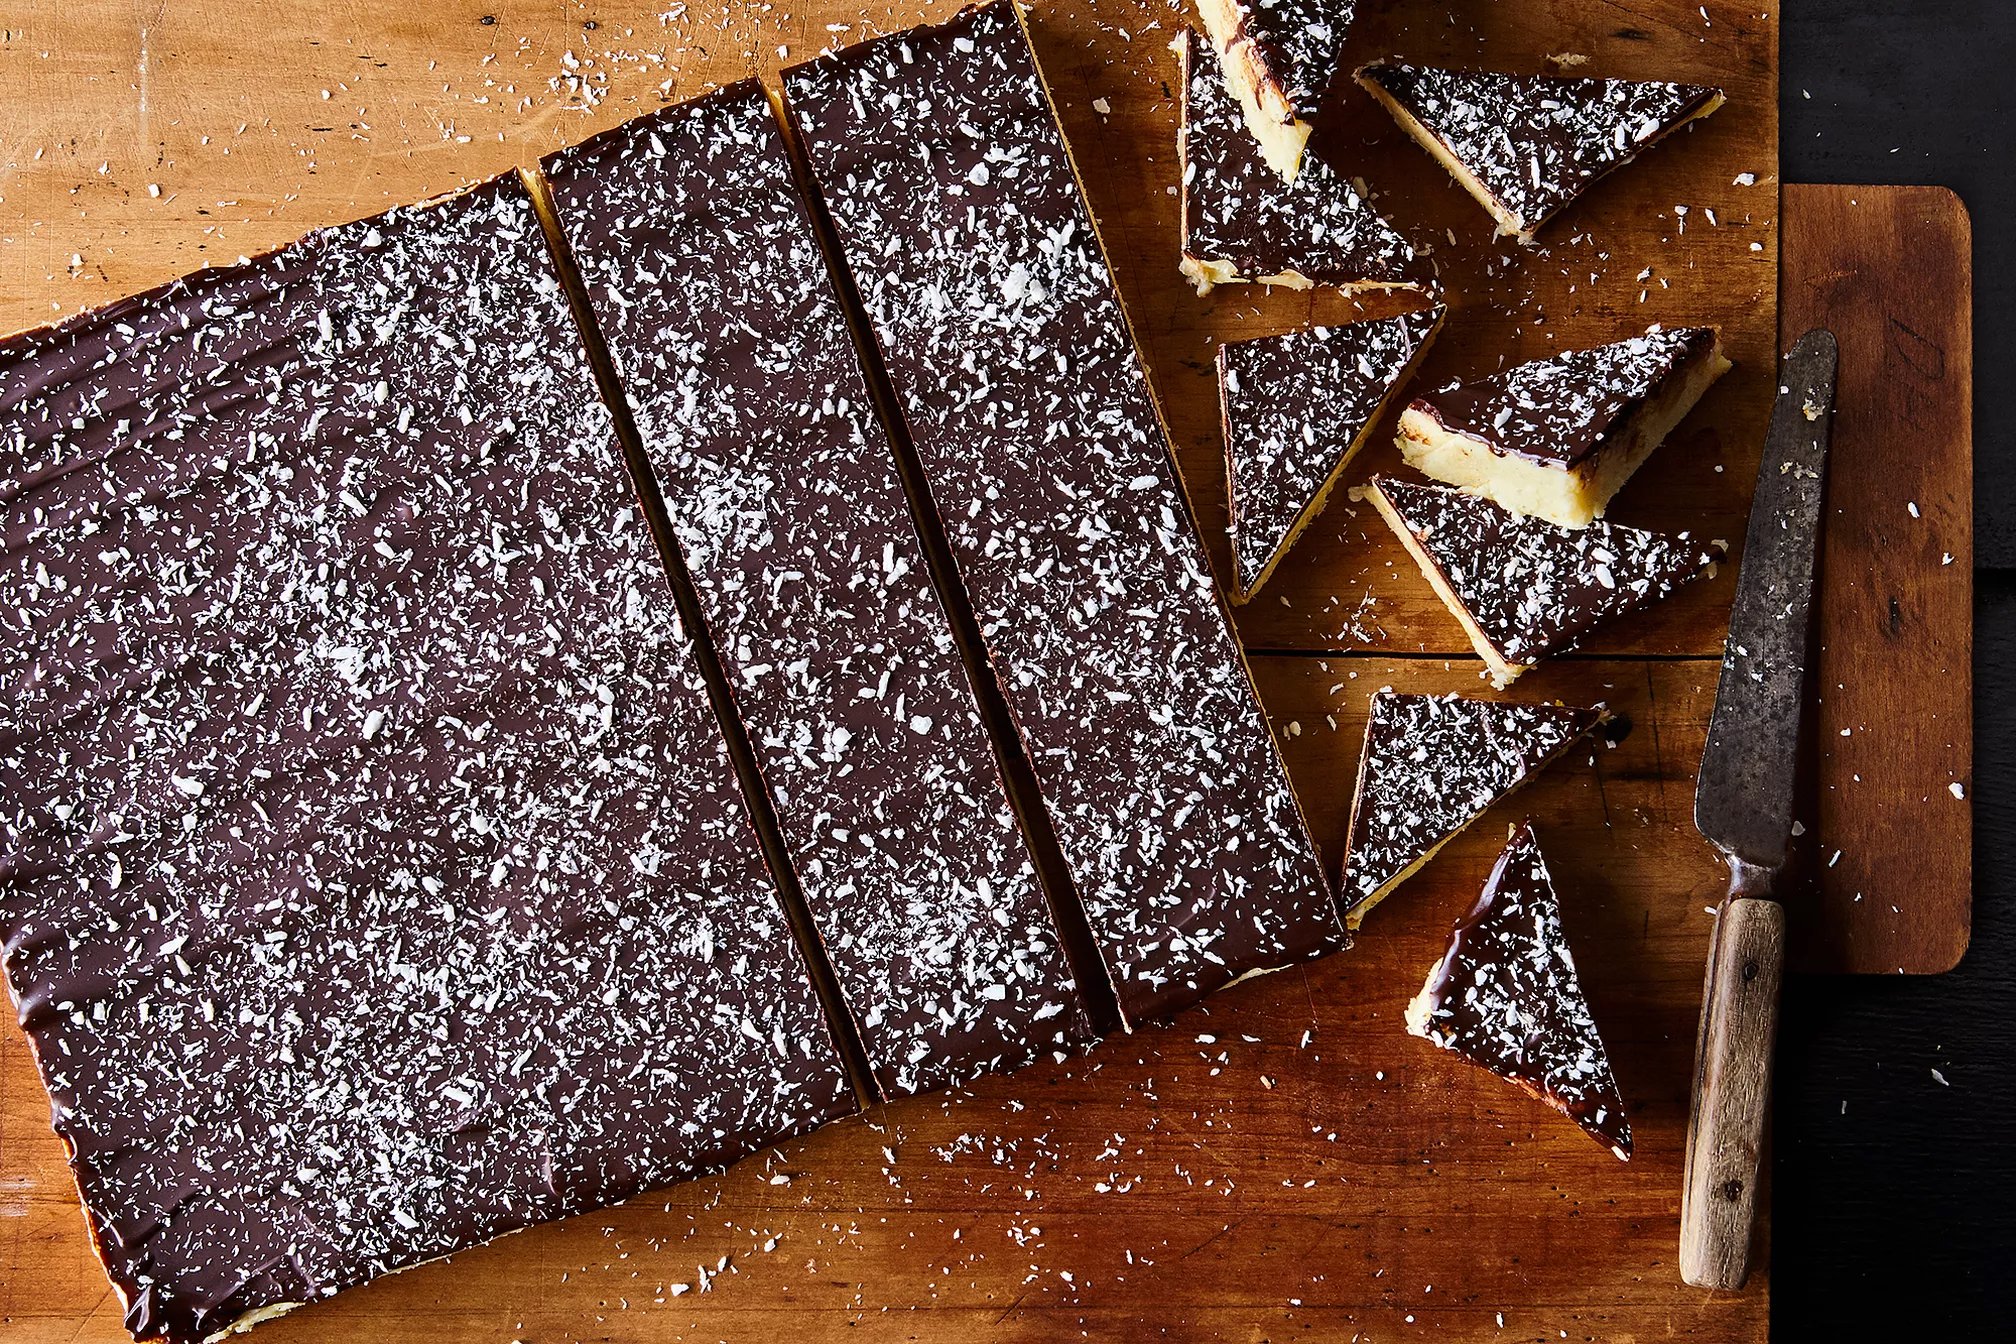
PHOTO BY ROCKY LUTEN
Makes 75 2-inch pieces
Ingredients
1 cup heavy cream
1 cup milk
2 oranges
1/2 cup sugar
1 pound white chocolate (chopped)
1 pound khoya (grated)
6 ounces unsweetened coconut powder, plus 2 tablespoons
1/4 teaspoon powdered green cardamom seeds
5 ounces semi-sweet dark chocolate
2 ounces butter
Instructions
Spray an 8x12-inch baking pan with non-stick spray and cover the bottom with parchment paper cut to size.
In a heavy-bottomed pot over high heat, bring milk and cream to a boil. Reduce heat to low, and stir the mixture continuously until it is reduced by half and has a thick consistency. This milk reduction is called rabri.
Zest the oranges, and add the zest and sugar to the rabri. Increase heat to medium, and cook until the sugar has melted and the rabri begins to bubble.
Reduce heat to low, and add white chocolate, khoya, and 6 ounces of coconut powder. After the addition of the coconut, the mixture will get quite thick and will look like it is about to set. (If it is at all thin or runny, add more coconut.) Add powdered cardamom seeds and mix well.
Pour the mixture into the prepared baking pan. Spread evenly, and level the top. Refrigerate for 6 hours.
Once set, use a knife to loosen the burfi, but keep it in the pan. Temper dark chocolate and butter in a double boiler, and pour over the set burfi. Sprinkle remaining coconut on top.
Return to refrigerator and allow chocolate topping to cool and harden. To serve, cut burfi into square or diamond shapes.Let the dough cool completely, 30 minutes to 1 hour.

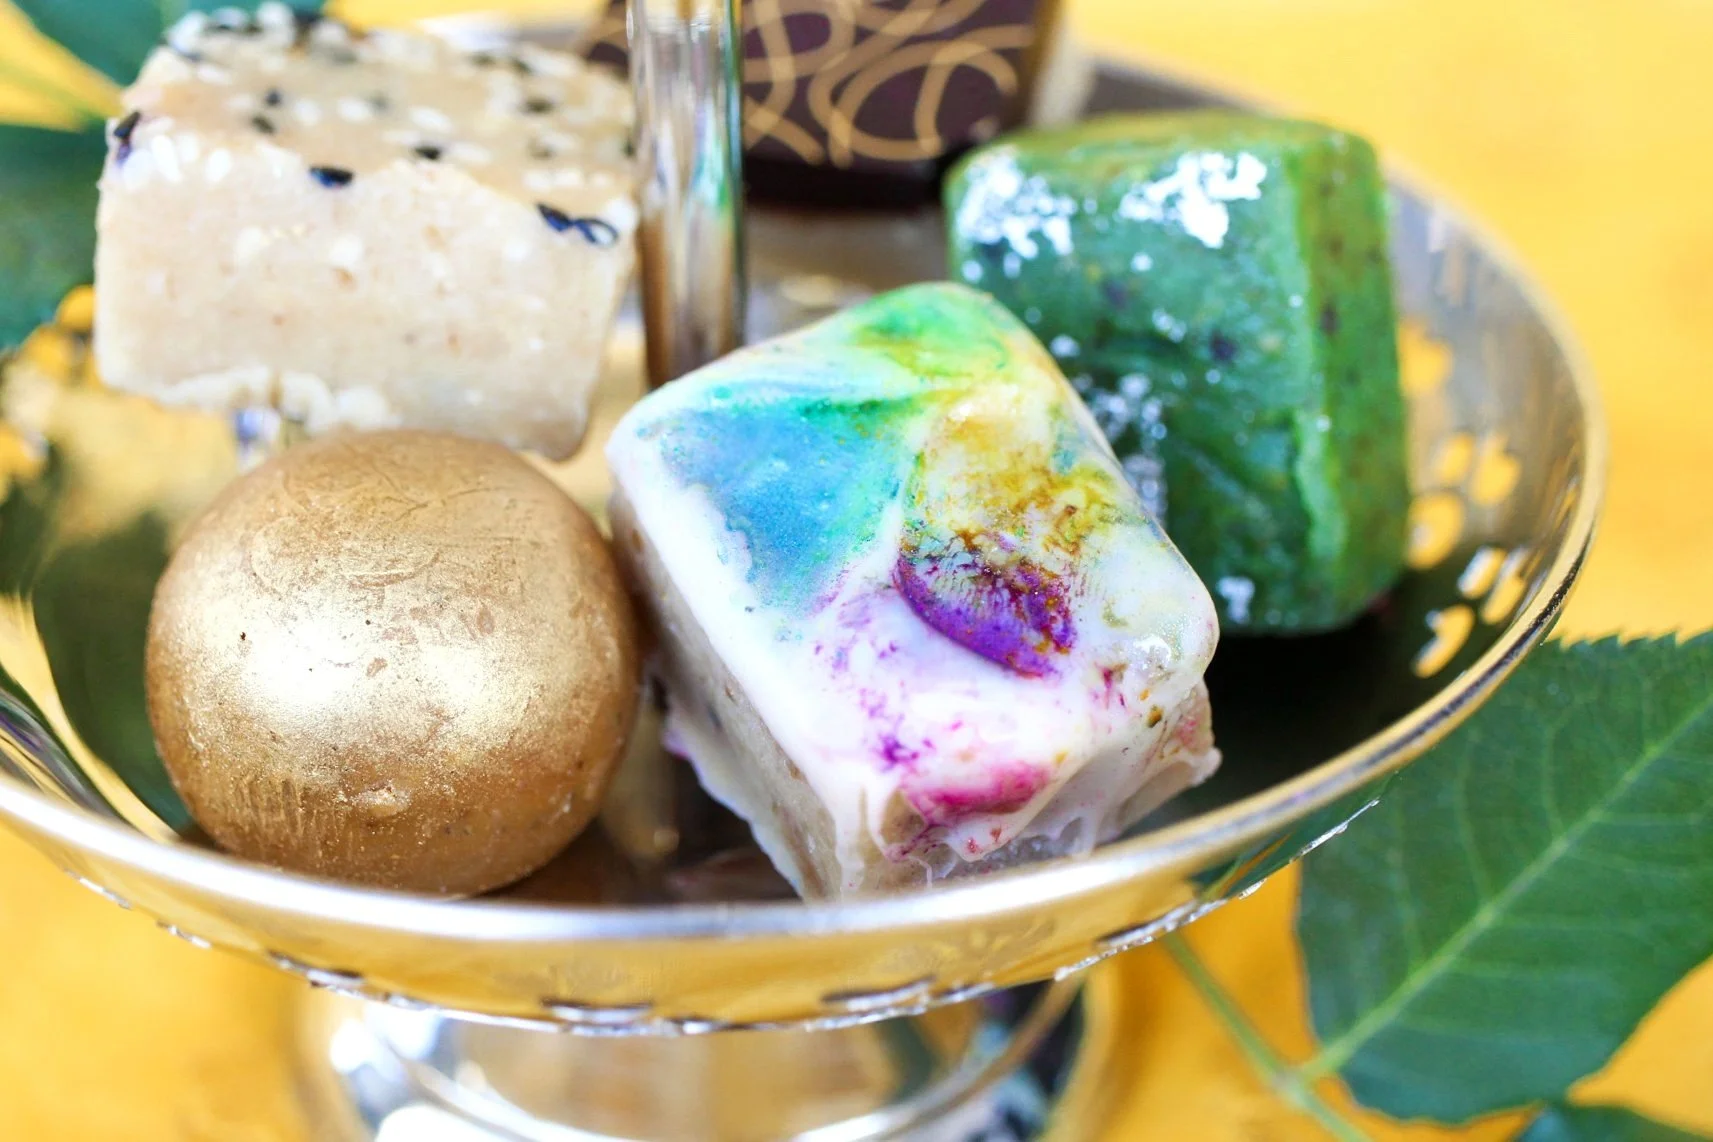
Recipe: Cardamom Kaju Katli
Kaju katli is a favorite sweet throughout India, one that chef Surbhi Sahni treasured as a child. For a dessert with such lavish ingredients, it's actually very simple to make and doesn’t require any special equipment or laborious techniques. Kaju katli is by default vegan and gluten-free, which makes it a sweet that many people can enjoy.
Originally published in the Washington Post
Kaju katli is a favorite sweet throughout India, one that I treasured as a child. For a dessert with such lavish ingredients, it's actually very simple to make and doesn’t require any special equipment or laborious techniques. Kaju katli is by default vegan and gluten-free, which makes it a sweet that many people can enjoy.
by Surbhi Sahni
Makes 48 pieces
Ingredients
6 cups (800 grams/28 ounces) whole unsalted raw cashews
2 cups (400 grams) granulated sugar
1/2 cup plus 1 tablespoon (135 milliliters) water (filtered, if your tap water isn't neutral-tasting)
2 teaspoons freshly ground cardamom (the seeds from about 40 pods)
2 tablespoons avocado, pecan or walnut oil (may substitute cocoa butter or vegan butter)
Food-grade edible glitter or luster dust (optional)
Instructions
Line a small (9-by-13-inch) rimmed baking sheet with parchment paper, spraying the pan with nonstick spray to help keep the parchment in place, if desired.
In a food processor, process the cashews in small batches until finely ground. Be careful not to overwork the nuts, to avoid leaching oil or turning them into butter. Sort through the powder with your fingers or sift through a wire mesh strainer to remove any large pieces.
In a large, deep nonstick skillet or saucepan (deep is important since it will be a lot to stir by the end) over medium heat, dissolve the sugar in the water. Whisk the sugar continuously until the mixture comes to a rolling boil and thickens into a syrup, which could take as long as 10 minutes. (Try to use a silicone whisk to avoid scratching the nonstick coating; a silicone spatula is also okay.)
Add the ground cashews to the syrup, reduce the heat to low and stir continuously with a wooden or silicone spatula until the mixture resembles a soft dough, 4 to 5 minutes.
Add the ground cardamom and avocado, pecan or walnut oil. Stir very briefly, just until the dough is well-combined and fluffy to the touch and takes on a glossy shine, 1 to 2 minutes. If you overcook, the mixture may end up on the dry or crumbly side.
Transfer the dough to the prepared baking sheet and let cool until you can work with it, but it is still warm, 1 to 2 minutes.
Using greased hands or a rolling pin, flatten the dough until it evenly covers the entire pan. Smooth down the corners using your fingertips or the flat side of a butter knife. The dough will be about 1/2-inch thick.
Let the dough cool completely, 30 minutes to 1 hour.
Invert the pan onto a clean, flat surface and peel off the parchment paper.
Use a clean ruler as a straight edge to help trim the edges with a sharp knife, then cut the dough into the desired shapes with the knife or a cookie cutter. (A good size is 1-by-2-inch bars.)
If using, dust the top of each piece with food-grade edible glitter and/or luster dust in bright colors for a festive shimmer.
Cook’s Note
You can use different kinds of oils for the added fat but avoid anything with a strong flavor. Opt for a good-quality, neutral oil with high saturated fat content, such as avocado or nut-based options, such as pecan or walnut. You can also use cocoa butter or a good-quality vegan butter, such as Miyoko’s.
Storage Notes: Kaju katli can be refrigerated in an airtight container for up to 1 month or frozen for up to 3 months.
Where to Buy: Food-grade edible glitter or luster dust can be purchased online or at cake/baking supply stores.

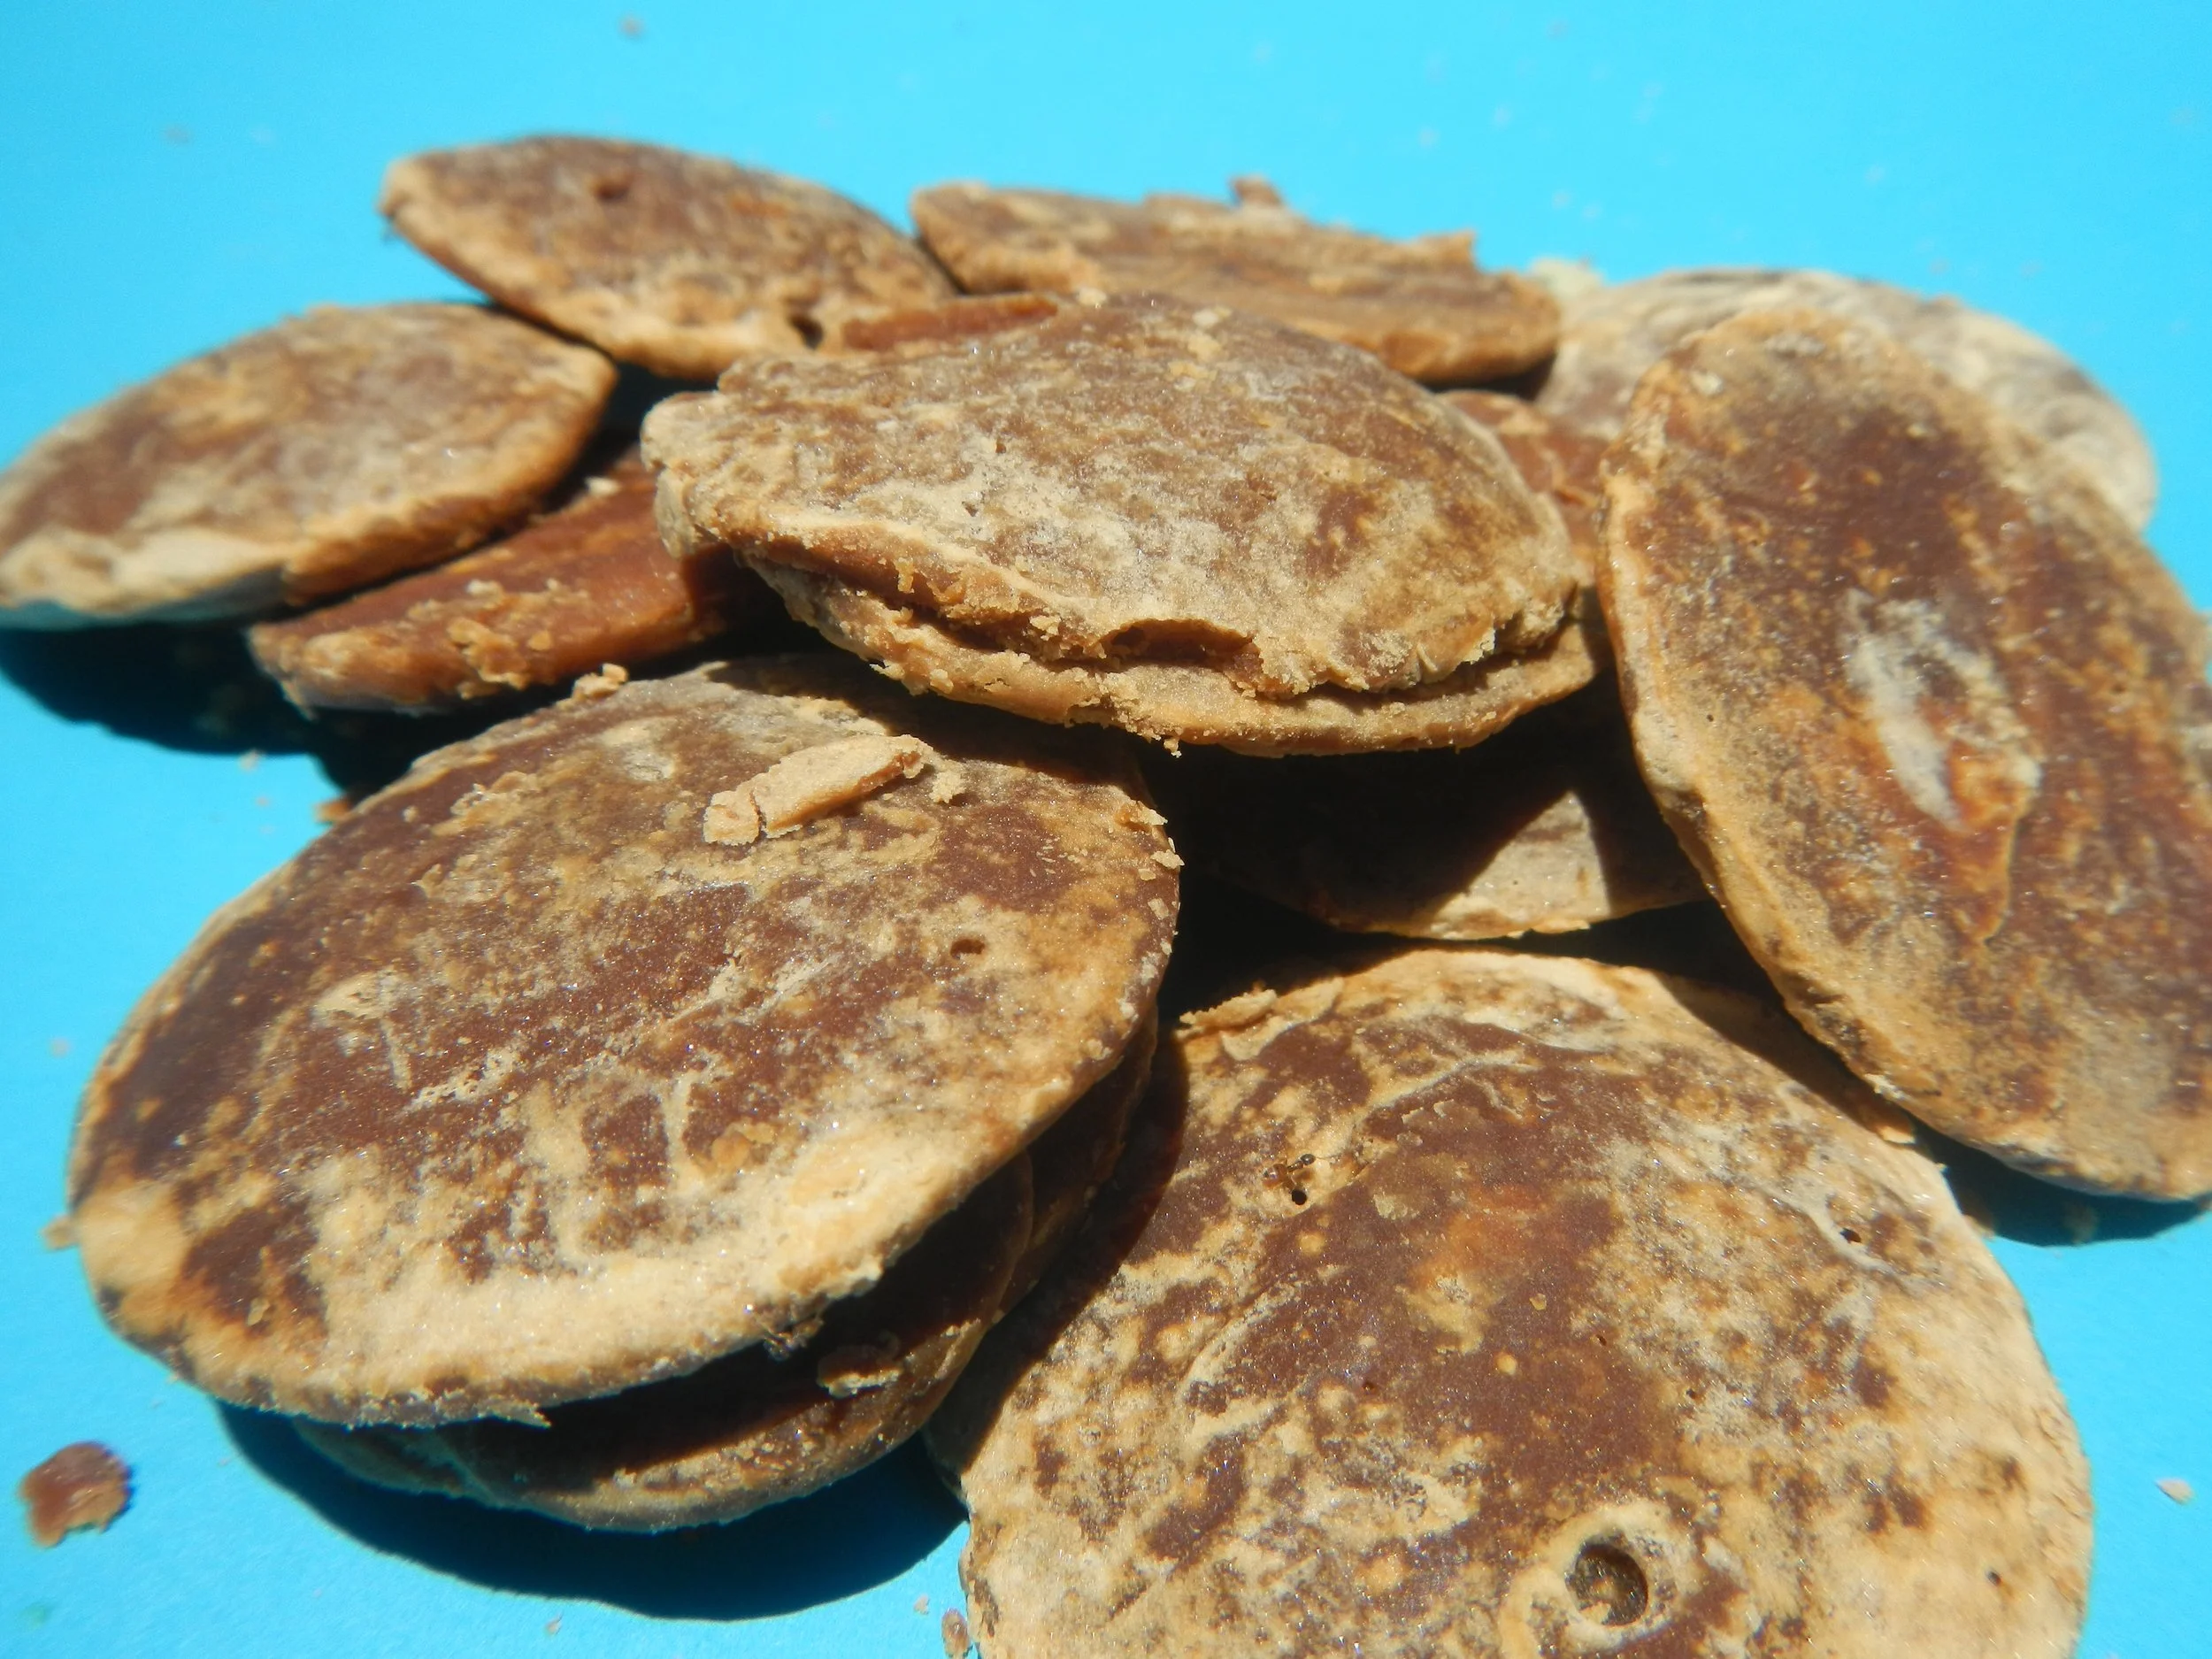
Recipe: Dahi Bhalla
Dahi bhalla is a chaat (street food) popular in Delhi with versions all over South Asia. It’s creamy and filling with a kick of spice and a hint of crunch. This version is inspired by my aunt who used to make dahi bhalla for nearly every special occasion, and we couldn’t get enough of it. The fried lentil dumplings are soaked in a tangy yogurt sauce, brightened by two chutneys that perform a balancing act of sweet and savory.
Originally published in Food Network
Dahi bhalla is a chaat (street food) popular in Delhi with versions all over South Asia. It’s creamy and filling with a kick of spice and a hint of crunch. The fried lentil dumplings are soaked in a tangy yogurt sauce, brightened by two chutneys that perform a balancing act of sweet and savory. It’s vegetarian and gluten-free and can be made dairy-free with vegan yogurt and nondairy milk. Home cooks can adjust spice levels to their tastes.
Some advance planning is required to prepare the dal (lentils) for the batter, but no special kitchen equipment other than a deep-fry thermometer is needed to make the recipe. This version is inspired by my aunt who used to make dahi bhalla for nearly every special occasion, and we couldn’t get enough of it.
by Surbhi Sahni

Makes 12 to 14 dumplings (serves 6 as a starter)
Ingredients
Bhalla Batter:
2 cups urad dhuli dal (split black gram)
Raita:
1 quart plain yogurt or vegan yogurt
1/2 cup milk or nondairy milk
1/4 cup sugar
1 tablespoon dried mint
1 teaspoon freshly ground black pepper
Fresh ginger, peeled and minced, to taste
2 teaspoons toasted cumin powder, optional (see Cook’s Note)
Pinch rock salt, optional
Dahi Bhalla:
Vegetable oil for frying
Kosher salt
1/2 cup tamarind chutney, store-bought or homemade, recipe follows
1/2 cup cilantro chutney, store-bought or homemade, recipe follows
1 tablespoon chaat masala
1 tablespoon toasted cumin powder (see Cook’s Note)
1 cup aloo bhujia or sev (crispy dried noodles, available in Indian grocery stores)
1/4 cup chopped fresh cilantro
Finely chopped fresh green chile, optional
Tamarind Chutney:
1/4 cup seedless tamarind block (available in most Indian and Thai grocery stores)
2 cups sugar, or to taste
One 2-inch piece fresh ginger, peeled and grated
1 teaspoon red chile powder, or to taste
1/2 teaspoon freshly ground black pepper
1/4 teaspoon rock salt
Kosher salt, to taste
Cilantro Chutney:
1 bunch fresh cilantro, rinsed and roughly chopped
2 or 3 fresh green chiles
One 1-inch piece fresh ginger, peeled and roughly chopped
2 to 3 tablespoons fresh lemon juice
1 tablespoon chaat masala
12 ice cubes (to maintain bright green color)
Kosher salt, to taste
Instructions
Special equipment: a deep-fry thermometer
Make the bhalla batter: In a large bowl, rinse the dal in cold water, rubbing the dal really well. The water will turn milky white. Drain the dal and repeat 3 times, or until the water is clear. Add 6 cups of cold water to the bowl, add the dal and set aside to soak for 6 hours.
Reserve 1 cup of the soaking water, then strain the soaked dal. Transfer the dal to a blender and add 1/4 cup of the soaking water. Blend until completely smooth. Add a little more water if the mixture is still chunky. The batter should have a thick consistency like a dense pancake batter. Leave the batter covered at room temperature for at least 2 hours or refrigerate overnight and bring to room temperature before using.
Make the raita: Stir the yogurt, milk, sugar, mint, black pepper, and ginger together in a bowl. Stir in the cumin and rock salt if using. Refrigerate until ready to serve.
Make the dahi bhalla: When ready to fry, add oil to a depth of 5 to 6 inches to a deep pot. Place over medium-high heat until the oil registers 350 degrees F on a deep-fry thermometer.
Stir about 1 1/2 teaspoons salt into the batter. Fill a medium bowl with water. Wet your hands in the water, then gently roll about 1/4 cup batter into a ball. Hold the ball in the center of your palm and make a hole in the center with a finger. (If you are unable to make a clean hole in the dough, just make smaller discs of about 2 tablespoons and no thicker than 1/2 inch.)
Working in batches, carefully place the formed dumplings into the hot oil; the dough will sink and immediately bounce back to the surface. Fry the dumplings until golden brown, about 5 minutes. Remove the dumplings with a slotted spoon and drain on a wire rack or paper towels. (We love eating dahi bhalla freshly made, but they can be finished later by cooling them completely, then freezing them in airtight containers.)
Bring 2 quarts of water to a boil in a saucepan. Add a generous pinch of salt and switch off the flame. After 5 minutes, place all of the fried dumplings in the water, cover and let sit 5 minutes. Remove the cover; the dumplings should be swollen. Take the dumplings out one at a time and use your hands to gently squeeze the water out of them.
To serve, pour a third of the prepared raita over one large serving platter or individual serving dishes (shallow dishes are preferable as you want the dumplings in a single layer). Place the dumplings on top and then cover the dumpling with the remaining raita. Drizzle with tamarind chutney and cilantro chutney. Sprinkle with chaat masala and cumin powder, and garnish with aloo bhujia or sev and cilantro. If you prefer the dish to be spicier, add fresh green chile to taste. Serve immediately.
Tamarind Chutney: Place the tamarind, sugar, ginger, chile powder, black pepper and rock salt in a saucepan and add 4 cups water. Bring to a boil. Cook, uncovered, for 1 1/2 hours over medium heat until the tamarind is dark in color and the mixture has thickened. The chutney should be thick but pourable; add more water if necessary.
Carefully transfer the mixture to a blender and puree. Taste and add kosher salt to taste, and more sugar if the sauce tastes very sour. Return the mixture to the pot and simmer for another 15 to 20 minutes. Cool completely. Keep refrigerated in an airtight container for up to 2 months.
Cilantro Chutney: Blend the cilantro, chiles, ginger, lemon juice, chaat masala, ice cubes and salt together in a blender until smooth. Refrigerate in an airtight container for up to 2 weeks.
Cook’s Note
To make toasted cumin powder, put cumin seeds in a dry pan and cook over medium heat, shaking the pan, until they are fragrant. Cool the seeds and crush into a powder.
When blending hot liquid, first let it cool for five minutes or so, then transfer it to a blender, filling only halfway. Put the lid on, leaving one corner open. Cover the lid with a kitchen towel to catch splatters, and pulse until smooth.
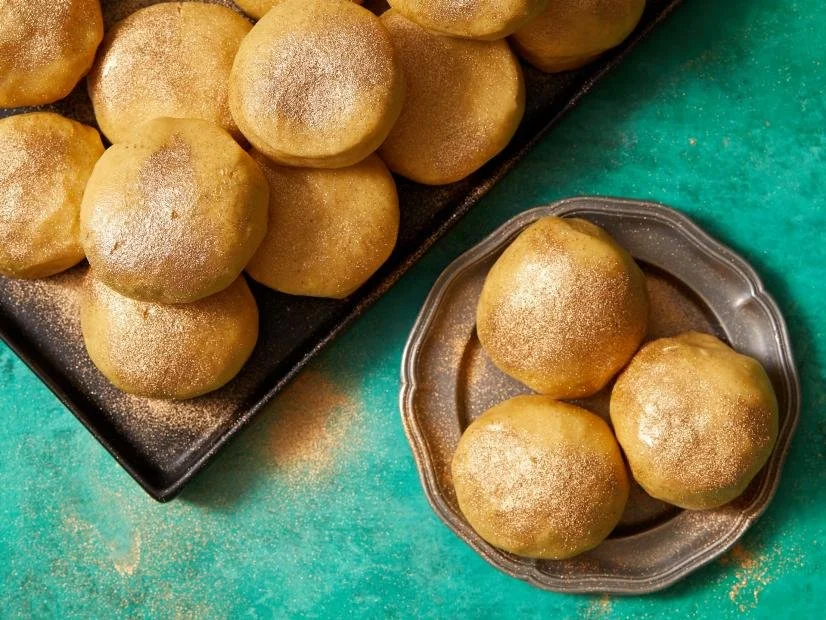
Recipe: Besan Ladoo
Besan ladoo is an iconic Diwali mithai. It is first mithai recipe I perfected and has been my favorite since childhood. As a kid, my dad used to surprise me and my brother by bringing home a small box of besan ladoos from the local mithaiwala. Made with just five ingredients (chickpea flour, cane sugar, cardamom and gold dust), besan ladoos are naturally gluten-free and easy to make at home with minimal kitchen equipment.
Originally published in Food Network
Besan ladoo is an iconic Diwali mithai. It is first mithai recipe I perfected and has been my favorite since childhood. As a kid, my dad used to surprise me and my brother by bringing home a small box of besan ladoos from the local mithaiwala. Made with just five ingredients (chickpea flour, cane sugar, cardamom and gold dust), besan ladoos are naturally gluten-free and easy to make at home with minimal kitchen equipment. They can be hand-rolled instead of pressed into traditional domed molds if you don't have them.
by Surbhi Sahni

Makes 12 to 14 pieces
Cook time: 3 hr (includes 2rs chilling)
Ingredients
1 1/2 cups (12 ounces) ghee, plus more if needed
2 1/2 cups (20 ounces) fine chickpea flour
5 ounces cashews, finely ground
2 teaspoons cardamom powder
1 1/4 cups (10 ounces) confectioners’ sugar
Pinch kosher salt
Edible gold dust or glitter, for decorating
Instructions
Special equipment: dome-shaped molds (optional)
Melt the ghee in a saucepan over medium-high heat. Lower the heat to low and add the chickpea flour. Keep the heat super-low while you stir the mixture with a flat-bottom spatula. Continue to stir until the mixture looks like wet breadcrumbs; if the mixture looks very dry, add an extra tablespoon of ghee to moisten it.
Continue to cook the mixture on very low heat for about 40 minutes. Don’t stray too far; it's important to stir the pot frequently to prevent the flour from burning. Within the first 20 to 25 minutes you will smell the chickpea flour, and the mixture begin to soften as the ghee melts into the flour. When the mixture is deep golden brown in color, add the cashews and cardamom. Cook for another 5 minutes to remove the raw flavor of the nuts.
Transfer the batter to the bowl of an electric mixer fitted with a paddle attachment. Add the confectioners’ sugar and salt and mix thoroughly. (You can also mix this by hand if you allow the batter to cool enough to touch.)
At this point, you can either press the mixture into dome-shaped molds, or scoop about 3 ounces out at a time and roll the mixture in your palms to make rounds. If using molds, put the molds in the freezer and then unmold the sweets when firm and refrigerate.
Refrigerate the sweets for at least 2 hours before serving. Remove them from the refrigerator about 5 minutes before serving to bring them to room temperature. Sprinkle the tops with gold dust. The besan ladoo will keep refrigerated in an airtight container for up to a month or frozen for up to 6 months.
India's Ancient Sweet Tooth
The story of candy starts in South Asia where sugarcane originated. Sugarcane was first cultivated by the Indus Valley civilization (what is now India). When you think of candy, you might not immediately think of India, but modern candy making owes its craft to the innovative art of refining sugar that was invented 8,000 years ago on the Indian subcontinent.
DIVING INTO THE ORIGIN OF CANDY
The story of candy starts in South Asia where sugarcane originated.
Sugarcane was first cultivated by the Indus Valley civilization in what is now India. When you think of candy, you might not immediately think of India, but modern candy making owes its craft to the innovative art of refining sugar that was invented 8,000 years ago on the Indian subcontinent.
Today, India’s bustling mithai shops, elaborate mithai culture, and jaggery production are mainstays of the country’s inventive past.
BEFORE CANDY THERE WAS KHAANDA
The English word candy comes from the ancient Sanskrit word khaanda, which describes sugarcane juice that was boiled and dried into small hard pieces. The first proto-candy made with sugarcane was distinct from desserts sweetened with honey and dried fruit elsewhere in the world.
According to candy historian Samira Kawash, it wasn’t until the Middle Ages that sugar was introduced to Europe from Asia and India through colonization. It took awhile for candy to become a developed culinary practice and for a long time was a luxury only available to the wealthy.
In the 18th century, candy became a vehicle for herbal medicines or sometimes prescribed as a remedy all by itself. A spoonful of sugar really does help the medicine go down. It wasn’t until the 19th century that the apothecary and confectionery started becoming separate professions in the U.S.
SAVOR THE TASTE OF HISTORY
Next time you eat a piece of candy or bite into a luxurious mithai, remember that it’s a piece of ancient Indian history that has carried its sweetness across the world.